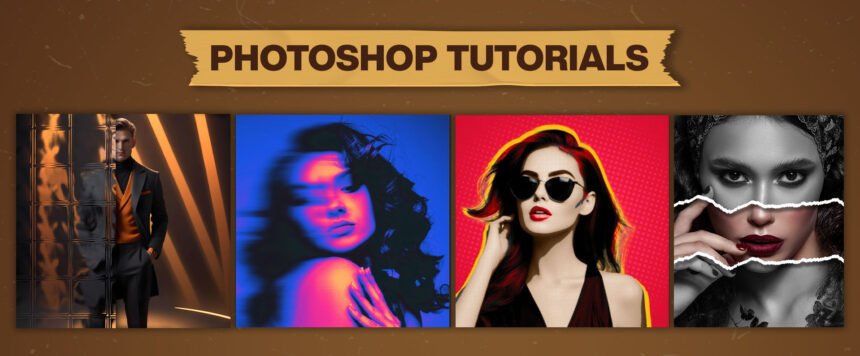
5 AMAZING PHOTOSHOP TUTORIALS FOR BEGINNERS.
Learning Photoshop gives you an advantage because it provides professional tools to make your work fast. Photoshop is an industry-based software used to create complex and professional designs. It is an all-in-one software for photo editing, color grading, graphic design and photo manipulations. In this post, we’ll learn amazing Photoshop tutorials to help you take your creativity to the next level.
Step By Step Guide for Photoshop Tutorials
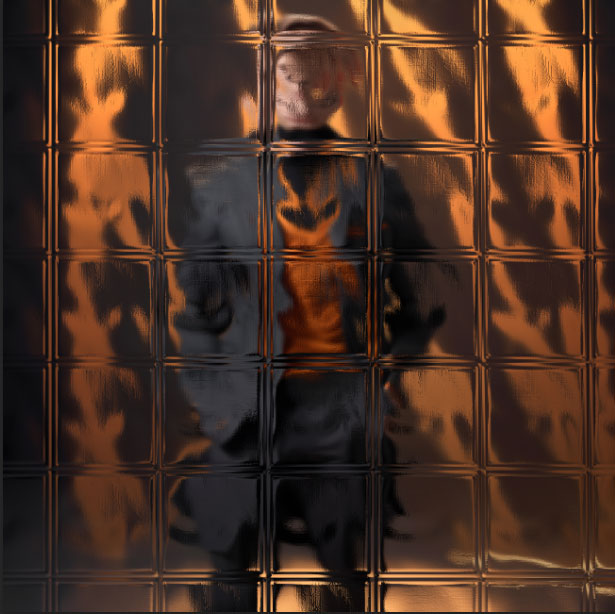
Glass effect in Photoshop tutorials
Selecting the artboard
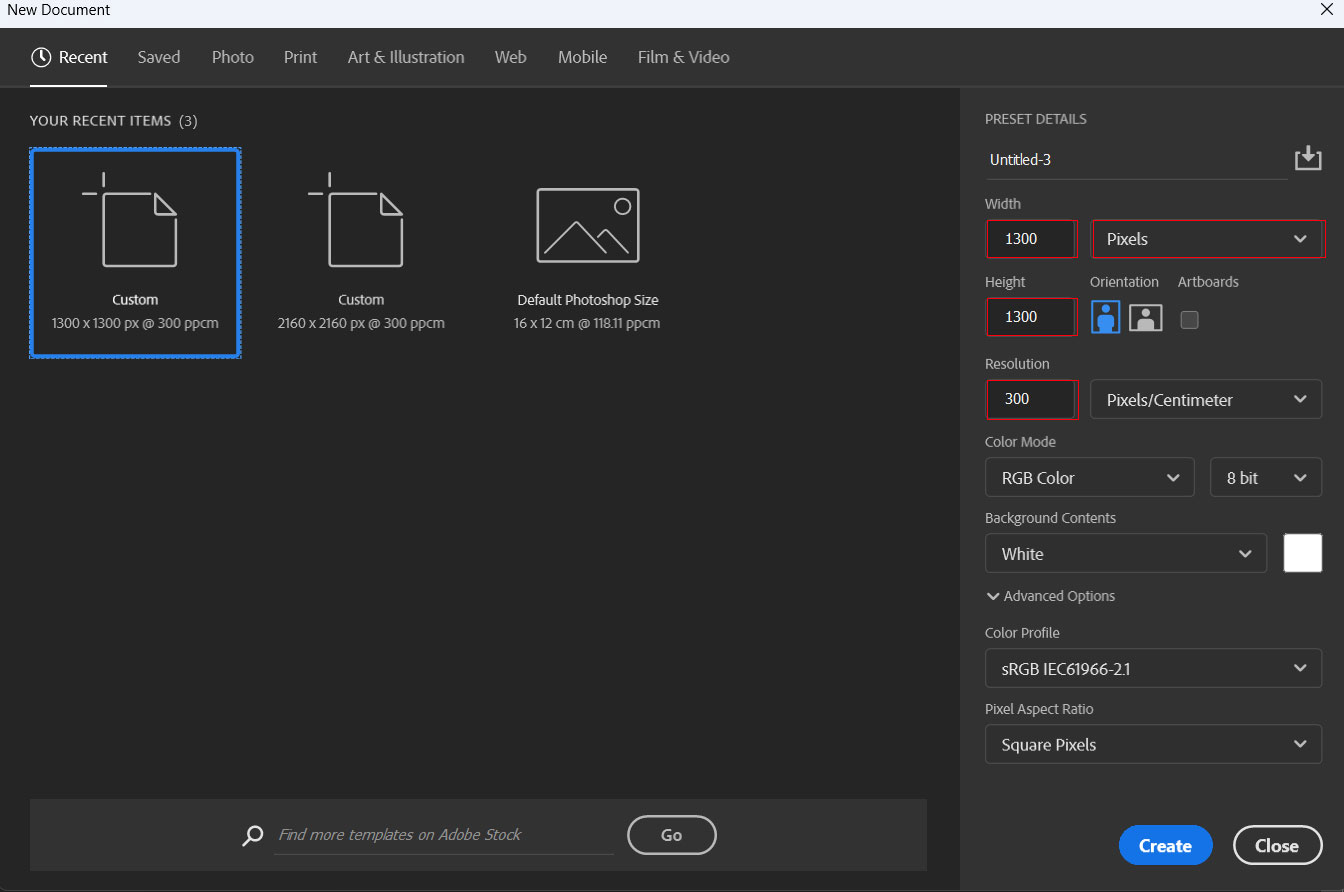
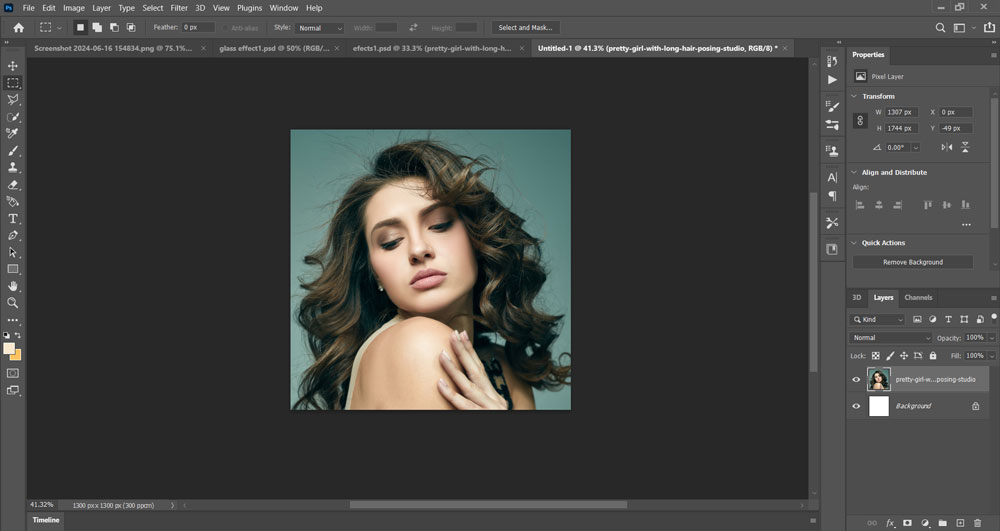
Step 1. Open Photoshop, go to File New then select the width to 1300px and height to 1300px.

Step 2. Drag and drop the image on the artboard, and adjust its position with the transform tool.
Gaussian blur
Step 3. Rename the layer to ‘Image layer’. Press CTRL+J to make a duplicate copy of the image layer
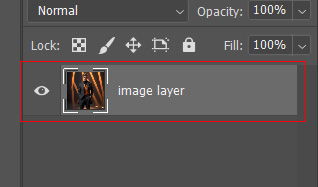
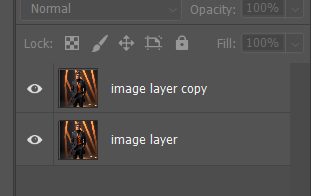
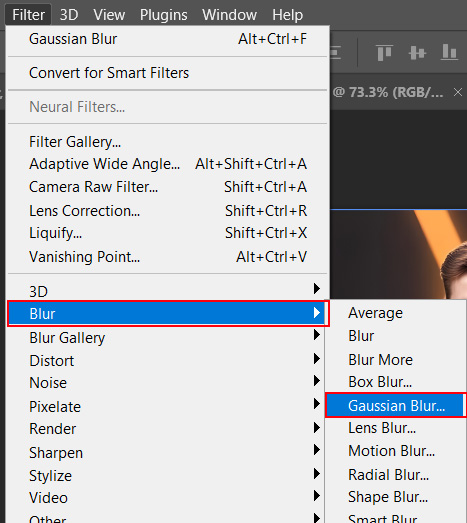
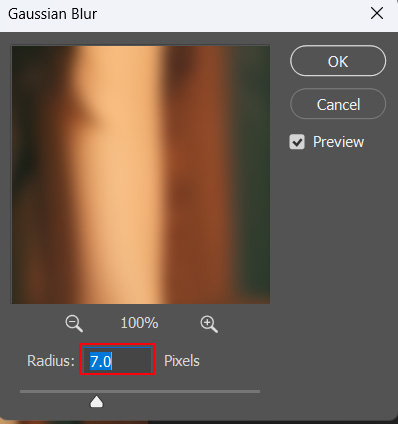
Step 4. Go to the filter option, then go to the blur option and select Gaussian blur. Set the radius to 7.0 and press OK.
Creating glass effect
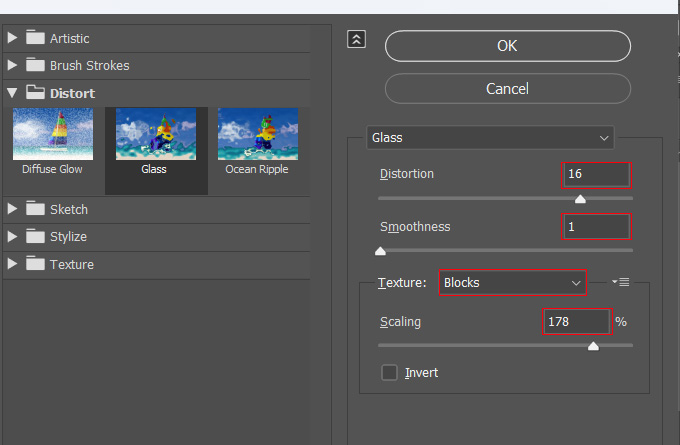
Step 5. Go to the filter gallery, and select the glass under the distort option. Set the Distortion to 16, smoothness to 1, scaling to 178. Keep the texture to blocks.
Finishing Steps
Step 6. After applying the filter gallery effect, you will notice the glass effect on the image. Now click on the layer (image layer copy) and go to the rectangular marquee tool.
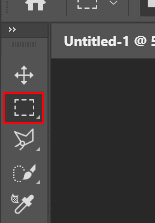
Step 7. As shown in the photo, draw a rectangle with a rectangular marquee tool and press delete. Double-click on the layer and add a drop shadow to show a realistic feel.
By following these steps you can easily create a glass effect in Photoshop.
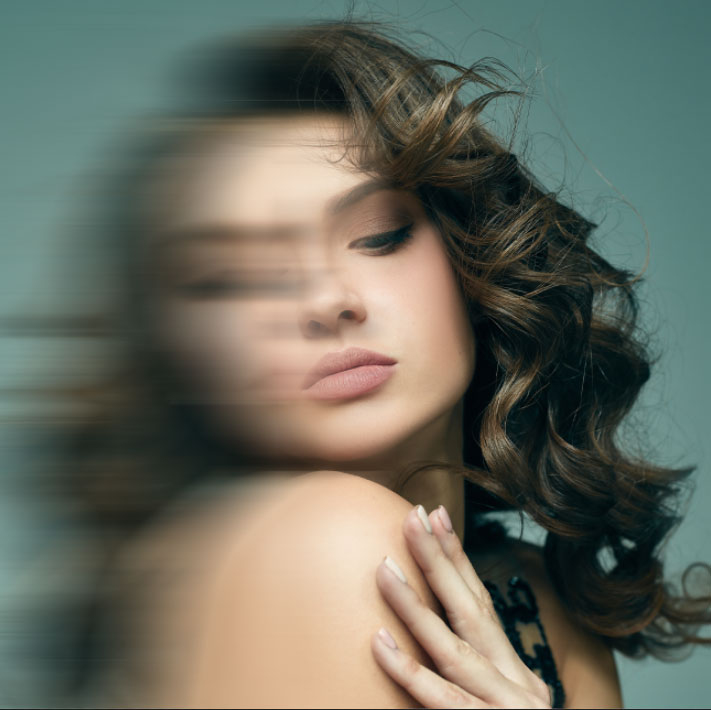
Gradient blur map in Photoshop tutorials
Step 1. Take a blank artboard of size 1300 by 1300px. Drag and drop the image on the artboard.
Adding Motion Blur

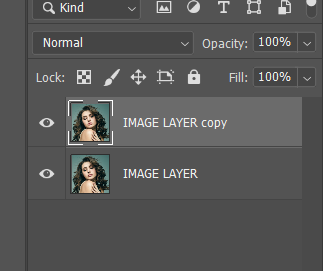
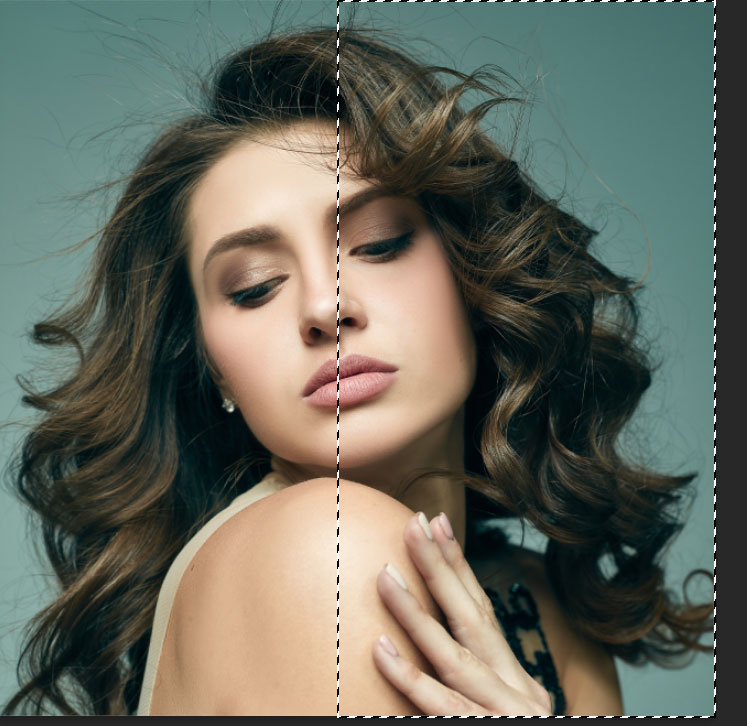
Step 2. Select the image layer and press CTRL+J to create a new layer. Click on the rectangular marquee tool, select the artboard from the centre, and press delete.
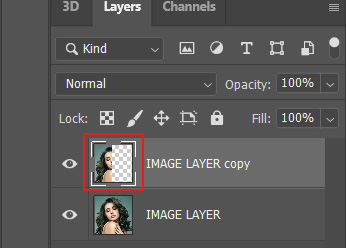
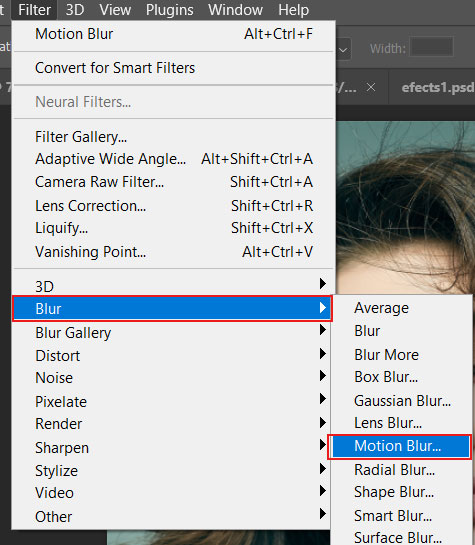
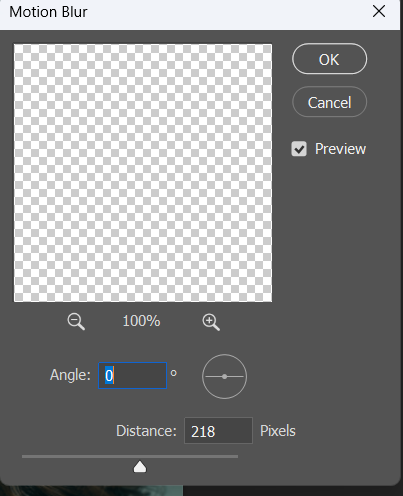
Step 3. Go to the filter option, click blur, then motion blur, and set the angle to 0 and distance to 288.
Adding Gradient Map
Step 4. Click on the New adjustment layer, then go to gradient map and select the gradient’s map color according to you.
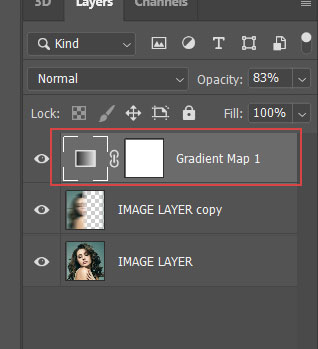
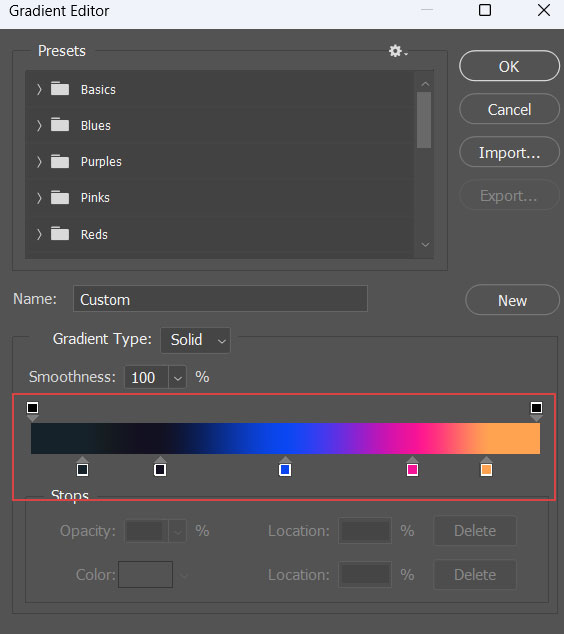
You will notice a cool aesthetic effect shows up.
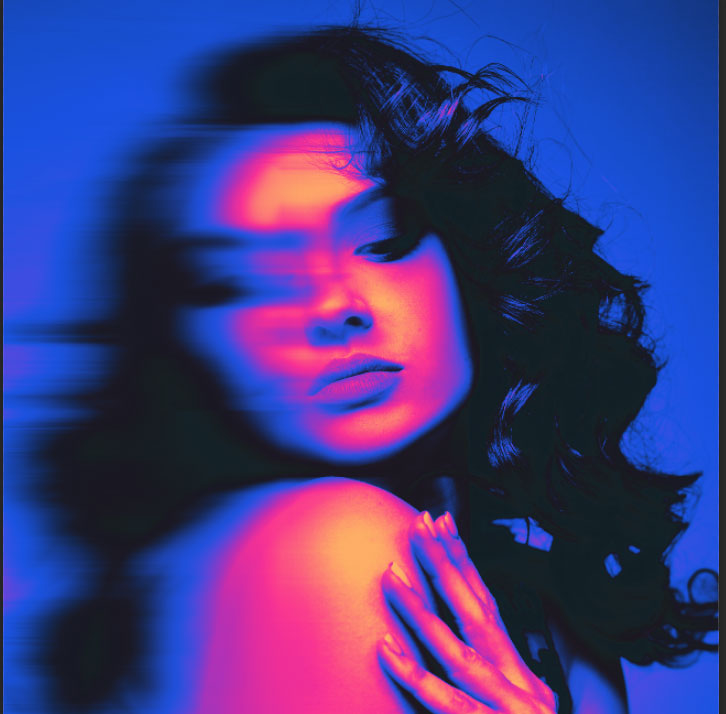
By applying this Photoshop tutorial, you can create a wonderful effect that can be used in various design processes.
Pop art Photoshop tutorials
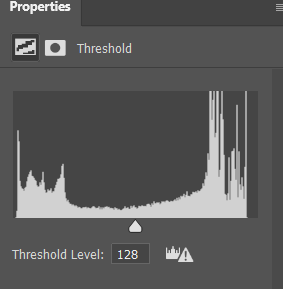
Step 1. Take a blank artboard and place the image on it. Go to the new adjustment layer and select threshold.
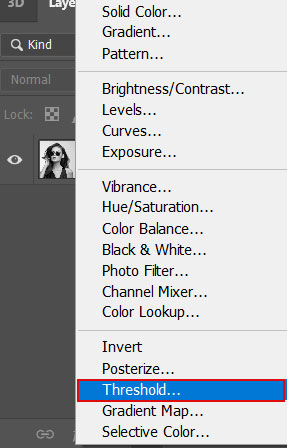
Step 2. Set the threshold value to 128 and opacity to 32
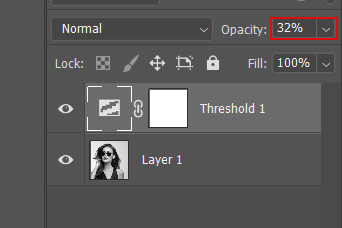
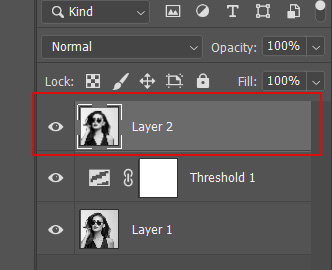
Step 3. Press CTRL+ALT+SHIFT+E to merge all layers and make a new copy, name it layer 2.
Setting Halftone pattern
Step 4. Go to the filter option on top, click the filter gallery, and select the halftone pattern.
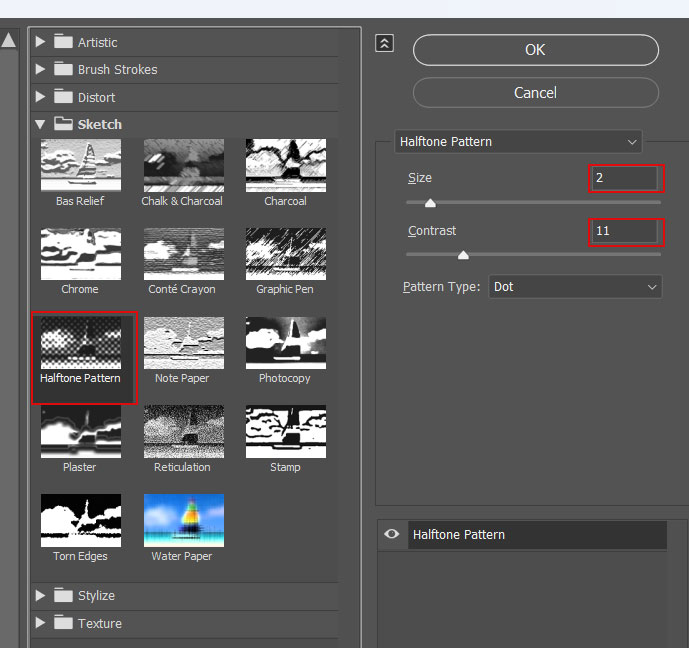
You will notice a dotted halftone pattern applied to the image.

Adding colors
Before painting the subject’s colours, you must learn about layer masking from my previous article.
Step 5. Create a solid color adjustment layer, set the color code to ffdec3 and change the blending mode to color.
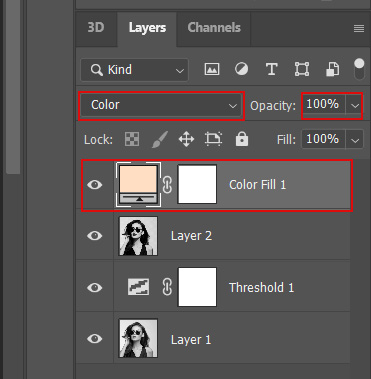
Step 6. Go to the brush tool and start painting in the masking area (foreground black color erases and white on foreground colors brings back the erased area).
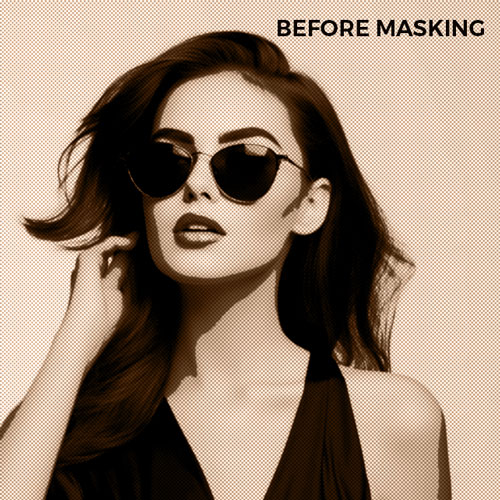

Step 7. Create another solid color adjustment layer and repeat the process to paint color on lips.
Step 8. Create a new adjustment layer and double-click on the layer to open blending options.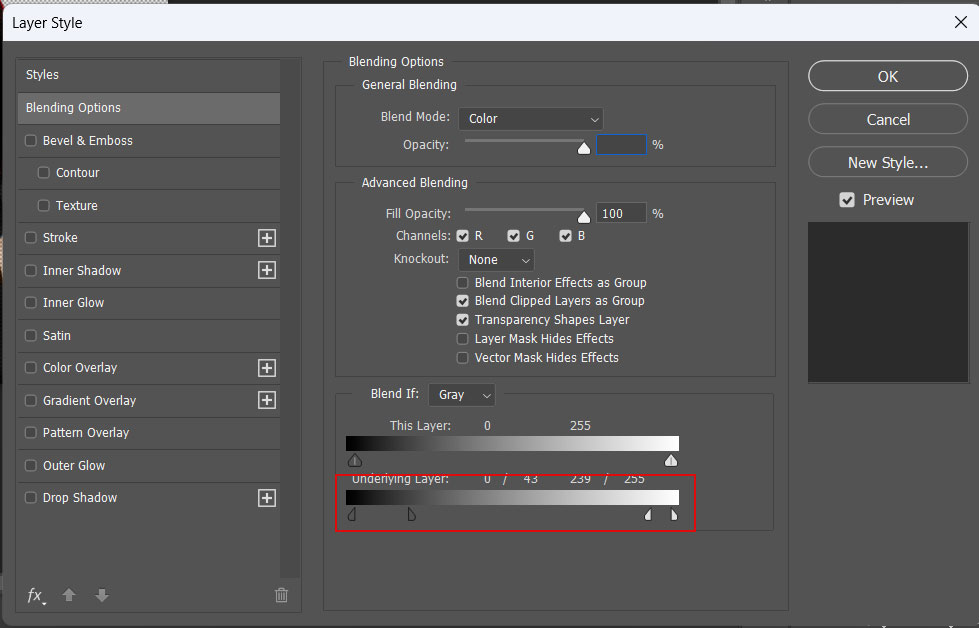

Step 9. Press CTRL+ALT+SHIFT+E to flatten the image and make a selection using the quick selection tool, then press CTRL+J to duplicate the layer.
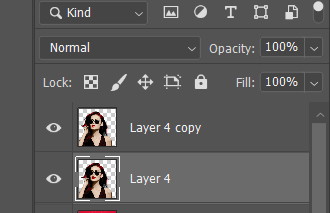
Step 10. Drag and drop the red color background behind layer 4.
Creating Outline effect
Step 11. Double-click on layer 4 to open blending options and set the color overlay to yellow. 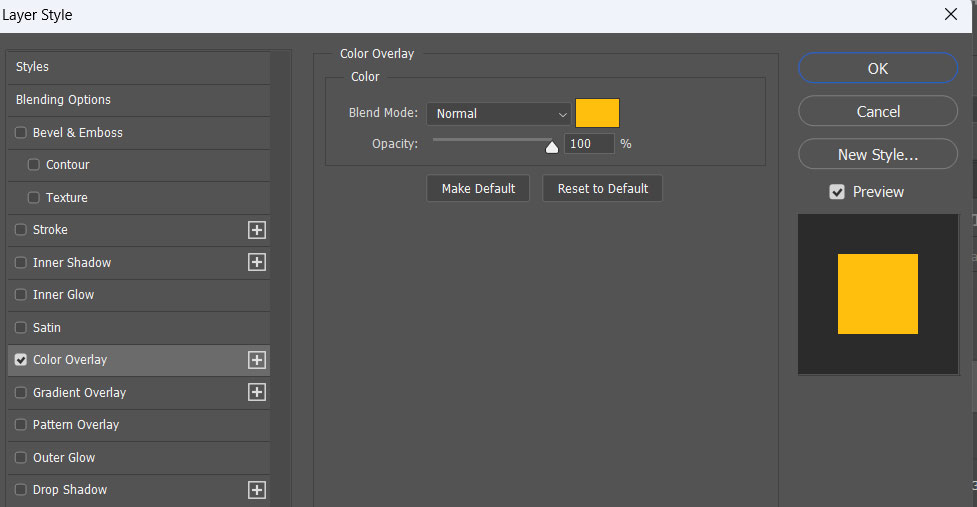
Step 12. Increase the size of layer 1 to create an outline effect.

Paper cut effect – photoshop tutorials
You can see this effect in many poster designs such as sports posters. It gives a trending and energetic vibe to design.
Download paper effect brush
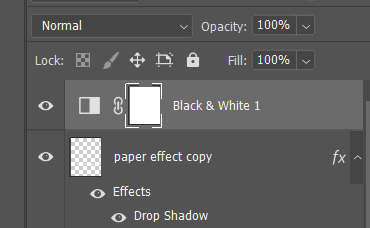
Step 1. Drag and drop the image on the artboard. Go to the new adjustment layer and click on black and white.
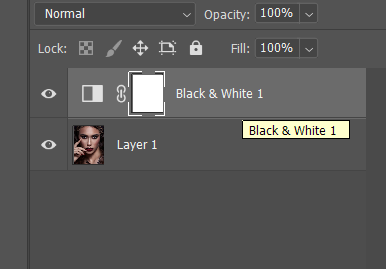
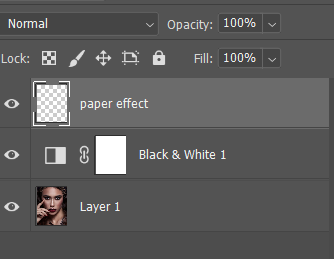
Step 2. Create a new layer by clicking on add a new layer and name it paper effect. Right-click to open brush options and select torn paper bushes (01. PSD)
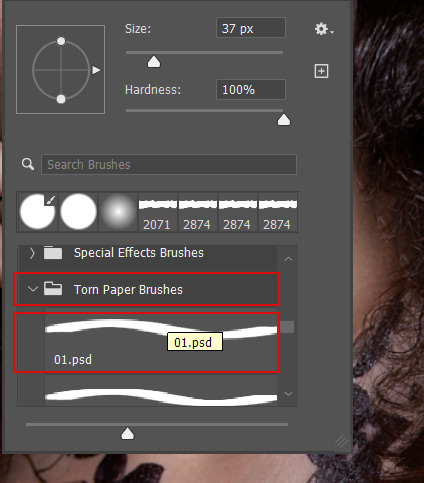
Step 3. Make sure the opacity and flow of the brush should be at 100%

Step 4. Click to paint on the paper effect layer
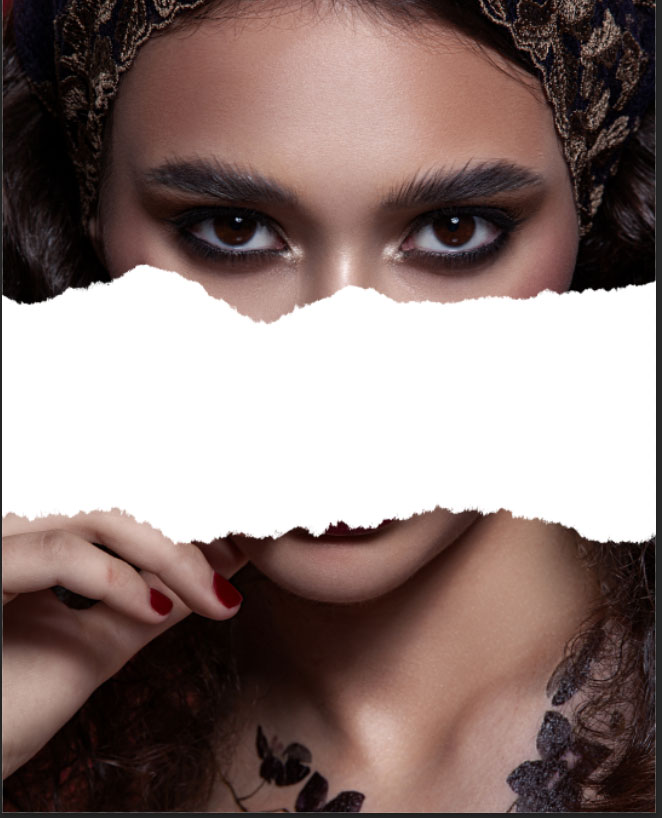
Step 5. To delete the area select the eraser tool right-click to open the eraser tool option and select torn paper brush ( 01. psd).

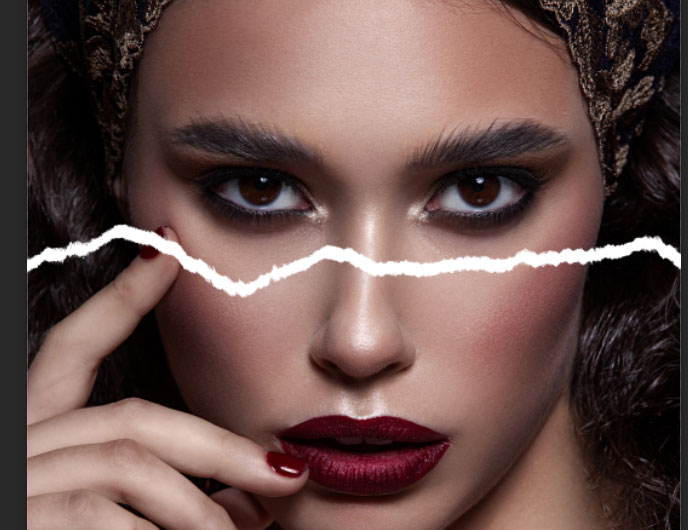
Step 6. Copy the paper effect layer and place it according to you.
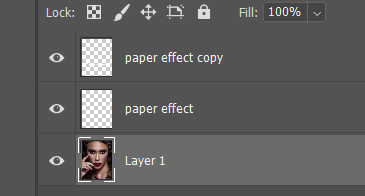
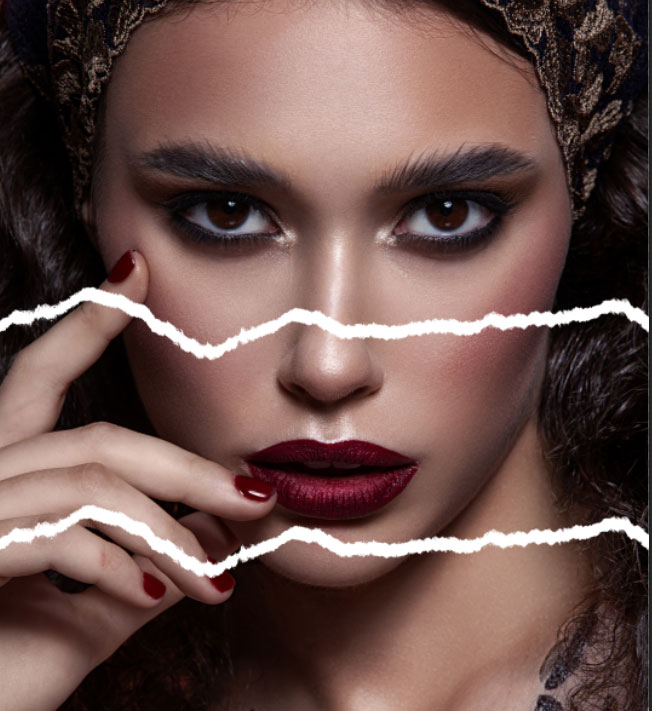
Step 7. Double-click on the paper effect layer to open the blending option and select drop shadow. Repeat this for both layers. 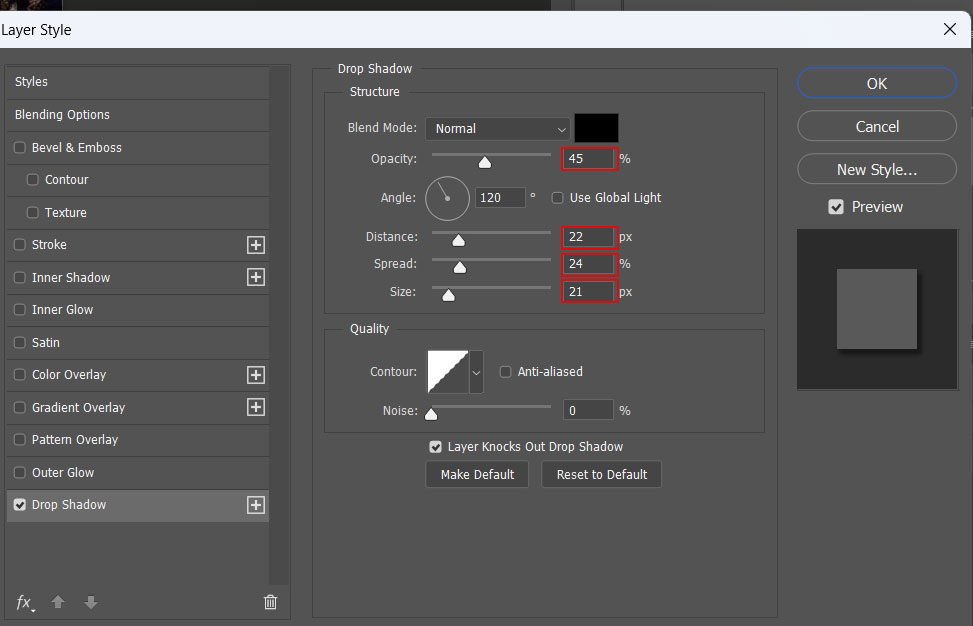
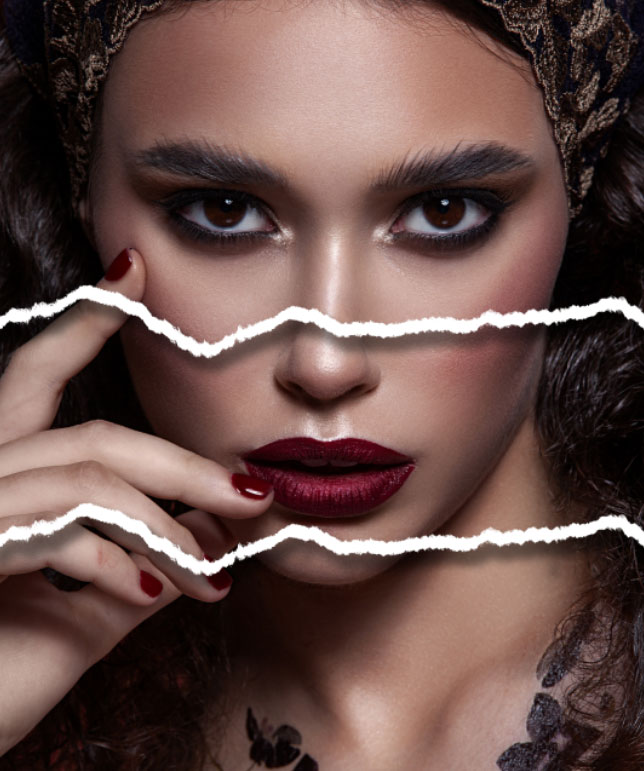
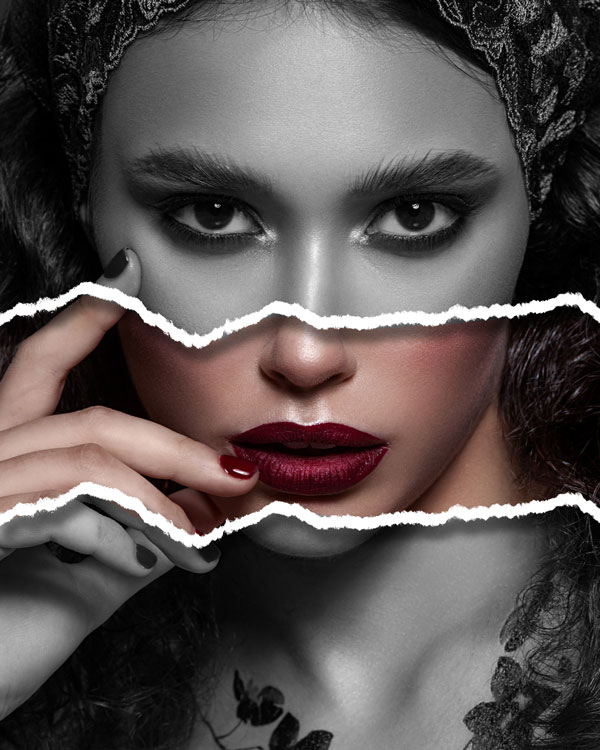
Step 8. Create a new black-and-white adjustment layer and delete the areas using the masking option outside the paper effect.
In Conclusion
These Photoshop tutorials are mostly used in poster designs, photo manipulation artworks and print designs to leave a memorable impact on the audience. Learn regularly to keep yourself updated with design trends. Happy designing!

