Introduction
Creating realistic mockups in Photoshop can improve your design presentation and help you see your work in a real-world context. Whether you’re working on packaging, logos, or 3D mockups, mastering these techniques will set you apart as a designer. In this guide, we’ll walk you through the easy steps to creating stunning mockups in Photoshop.
Understanding the Basics: What is a Mockup?
Before we get into the techniques, let’s clarify what a mockup is and why it’s important for designers. A mockup is a static representation of a design, typically showing how it will appear in the real world. From product packaging to logos on merchandise, mockups provide clients with a visual preview of the final product.
Why Use Mockups in Photoshop?
Mockups aren’t just a visual tool; they’re a powerful way to communicate your design ideas. Here’s why mockups are important:
- Client Presentation: Clients can better understand your vision when they see it in a realistic setting.
- Design Validation: Mockups allow you to see how your design works in the real world, helping you identify any potential problems before final production.
- Marketing Materials: High-quality mockups are perfect for creating marketing materials for social media or print.
Getting Started: What You Need
Before we get into the techniques, make sure you have the following:
- Photoshop Software: The latest version of Photoshop to access all the necessary tools.
- High-Resolution Images: Quality matters. Always use high-resolution images to make your mockup as realistic as possible.
- Smart Objects: These are essential for non-destructive editing and easy customization.
Essential Tools in Photoshop for Creating Mockups
When creating realistic mockups in Photoshop, it’s important to know how to use the right tools. These tools help you achieve professional-quality results, ensure your designs stand out and communicate your vision effectively. Here’s how they help in the mockup creation process:
1. Smart Objects
Smart objects allow you to maintain the quality of your design while making edits. When you convert a layer to a smart object, you can scale, transform, and apply effects without losing the original quality. This is especially helpful in mockups where you may need to adjust the design multiple times or use the same design in different mockup templates. By keeping your design as a smart object, you ensure that every change looks sharp and professional.
2. Layer Styles
Layer styles such as drop shadow, bevel and emboss, and gradient overlay add depth and realism to your mockup. For example, adding a drop shadow can make a logo appear as if it is rising off the page, while bevel and emboss can create a three-dimensional effect. These styles help your mockup look more attractive and realistic, enhancing the overall impact of your design.
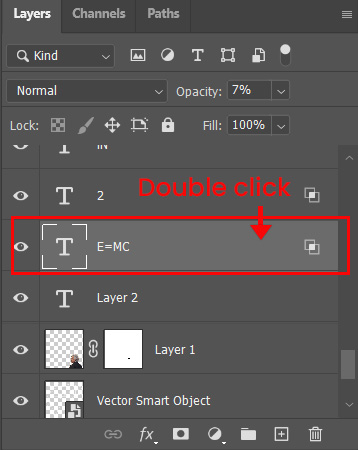
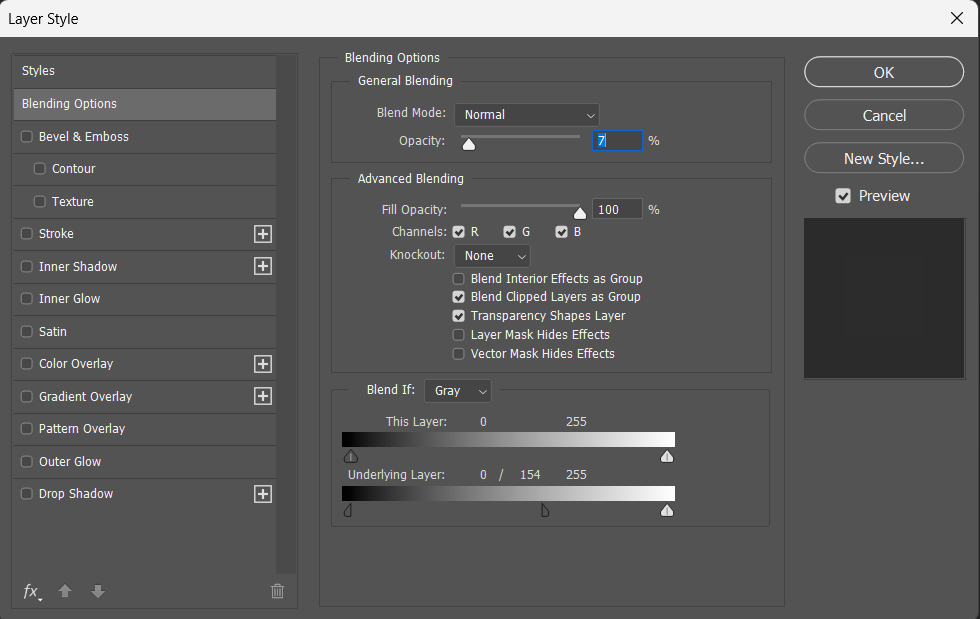
How to find: Double-click on the layer to open “layer style”.
3. Create mockups using Clipping Masks
Clipping masks are essential for accurately placing your design in specific areas of your mockup, such as restricting a pattern to a specific part of the packaging. They allow you to apply textures, patterns or designs exactly where you want them, ensuring a clean and professional look. This is especially useful for packaging or clothing mockups, where the design must fit perfectly into a predefined shape.
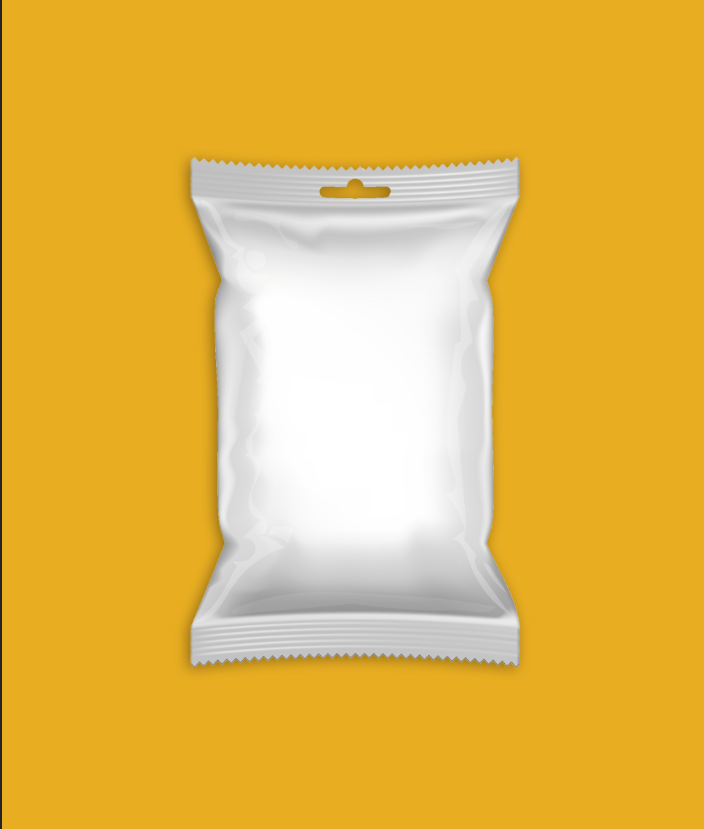


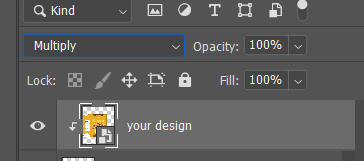
How to Create: Place your design on the artboard. Now place your design above the layer of the 3d model of the packet, right-click on the layer and select “create clipping mask”.
Change the blending mode of the layer to “multiply” for a realistic effect.
4. 3D Tools
Photoshop’s 3D tools enable you to create three-dimensional mockups, which are ideal for product packaging and other designs that need to show depth. By converting your design into a 3D object, you can apply your artwork to different surfaces, rotate the object to view it from all sides and adjust lighting and shadows to match the real-world environment. This makes your mockup more visually appealing and gives clients a clear idea of what the final product will look like.
Step-by-Step Guide on How to Create Mockups in Photoshop
1. Choose the Right Template
Start by choosing a mockup template that suits your design. Websites like Freepik and GraphicBurger offer a huge collection of free and premium mockup templates. Make sure the template you choose suits your design goals and the client’s needs.
2. Use Smart Objects for Easy Editing
Smart objects are your best friend when creating mockups in Photoshop. They allow you to easily change design elements without affecting the original image quality. To use smart objects:
1. Open your mockup template in Photoshop.

2. Locate the Smart Object layer in the Layers panel.

3. Double-click the Smart Object thumbnail to open it in a new window.
4. Replace the placeholder with your design, save, and close the window. Your mockup will update automatically.


3. Mastering Shadows and Highlights
To make your mockup more realistic, focus on shadows and highlights. These add depth and dimension, making your design look like it’s part of the scene. Use the following techniques:
- Drop Shadows: Apply a subtle drop shadow to your design layer to simulate natural shadows that occur in real life.
- Inner Shadows: Use inner shadow to give your design a raised look, adding more realism.
- Highlight Adjustments: Create a new layer above your design, set it to “Overlay,” and use a soft brush with low opacity to paint in highlights where the light would naturally fall on the object.
4. Include textures for added realism
Texture can make a significant difference in the authenticity of your mockup. Whether it’s the grain of paper, the weave of fabric, or the surface of a package, adding texture brings your design to life. Here’s how:
- Overlay Textures: Use high-resolution texture images and overlay them on your design using blending modes like Multiply or Overlay.
- Displacement Maps: For more complex surfaces, use displacement maps to make your design conform to the underlying surface texture, adding realism to your mockup.
5. Color Matching and Lighting Adjustments
Make sure the colors of your design match the lighting of the scene to avoid a flat, unrealistic look. Adjust the color balance and lighting to make your design blend seamlessly with the background. You can achieve this by:
- Using Adjustment Layers: Apply adjustment layers such as Levels, Curves, or Color Balance to match the overall color tone of the scene.
- Dodging and Burning: Use the dodge and burn tools to adjust specific areas, increasing the depth and realism of your mockup.
Why Realism Matters in Mockups
Realistic mockups are more likely to resonate with clients and stakeholders. They bridge the gap between concept and reality, making it easier for everyone involved to see the potential of your design. Additionally, realistic mockups can be reused for marketing materials, saving you time and effort.
How To Create complex 3D shapes for mockups using Adobe Photoshop.
This tutorial explains how to turn a basic design into a realistic 3D model using techniques like extrusion, lighting, and texture mapping. It’s perfect for designers who want to step up their mockup game with advanced 3D elements. I highly recommend watching it to enhance your Photoshop skills.
How To Create Realistic Mockups for Your Logo Designs!
Another tutorial on “How to Create a Mockup in Photoshop” breaks down complex processes into easy steps. It highlights key techniques such as layering, lighting, and texturing, making it perfect for designers looking to enhance their skills. Whether you’re working on product packaging or a logo mockup, this video provides valuable information to improve your designs.
Creating Packaging Mockup using Photoshop
This tutorial explains how to use smart objects, lighting effects, and shadows to make your packaging designs more professional and vibrant. This is a great resource for designers who want to improve their mockup presentation skills. Whether you’re a beginner or an experienced designer, this tutorial provides valuable tips to make your packaging mockups stand out.
Common Mistakes to Avoid When Creating Mockups
When creating mockups in Photoshop, it’s easy to make mistakes that can affect the result. Here are some common mistakes to look out for, as well as ways to avoid them:
1. Ignoring Mockup Resolution Consistency
A common mistake is not matching the resolution of your mockup to the resolution of your design. If the resolutions don’t match, your design can look pixelated or blurry when you resize or scale it. To avoid this, always check that the resolution of your mockup and design is the same. This ensures that everything looks sharp and clear, no matter the size.
2. Skimping on Mockup Realism
Another mistake is to use flat, unrealistic backgrounds in your mockups or ignore real-world imperfections. While it can be tempting to make everything look perfect, adding small imperfections – such as slight shadows, textures, or wear and tear – can make your mockup look more realistic. This helps your mockup look closer to how the product looks in real life, making it more believable and appealing.
3. Neglecting Mockup Scaling
Finally, don’t forget to check how your mockup looks at different sizes, especially if it’s for a large format like a billboard. Scaling your mockup up and down helps you see if its quality remains intact across all sizes. This is important because a design that looks great on a small screen may not look good when enlarged. Always review your mockup at different scales to make sure it maintains its quality and impact.

