Photography is more accessible than ever, but using the right photography tools can significantly improve your results. Instead of getting caught up in buying every new gadget, focus on learning with the essential tools that truly make a difference. Many professionals agree—mastering photography is more about understanding the tools you have than owning every piece of gear. Whether you’re shooting with a DSLR, mirrorless camera, smartphone, or even film, choosing the right photography tools based on your budget and style will help you take better photos with confidence. This guide walks you through the core equipment every beginner should know and how each tool can elevate your photography.
Entry-Level Cameras (DSLR, Mirrorless & Compact)
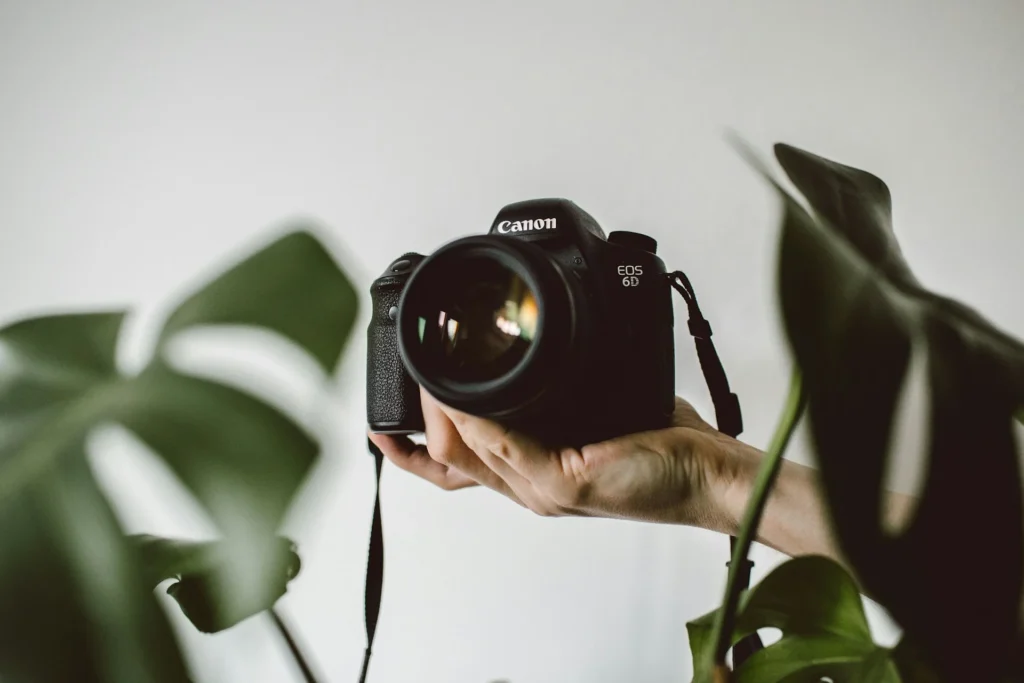
Your camera is the foundation of your kit. Entry-level DSLRs (digital SLRs) such as the Canon EOS Rebel T8i or Nikon D3500 offer manual controls, optical viewfinders, and robust ergonomics, making them popular among beginners. DSLRs typically have larger batteries and a wider range of compatible lenses. In fact, DSLRs offer “an ideal blend of manual control and superior image quality” that helps new photographers learn the basics.
Mirrorless cameras, on the other hand (such as the Sony a6000 or Canon EOS M50), are smaller and lighter. Mirrorless models often have electronic viewfinders and faster autofocus. Many novice shooters find mirrorless cameras attractive because they offer real-time exposure previews and quieter shooting modes. For example, the Sony a6000 and Fujifilm X-T200 are often recommended as entry-point mirrorless cameras.
Each system has its advantages and disadvantages. DSLRs (with mirror mechanisms) are better in battery life and feel (you look through a true optical viewfinder), while mirrorless bodies are better for technical features. New photographers should consider:
- DSLR Pros: Optical viewfinder, long battery life, rugged build, vast lens selection.
- DSLR Cons: Bulkier size, slightly older autofocus systems.
- Mirrorless Pros: Compact/light bodies, live electronic preview, advanced autofocus and video.
- Mirrorless Cons: Generally shorter battery life (EVF consumes power), and lens mounts still catching up.
You might also consider compact/bridge cameras. These all-in-one cameras (such as the Canon PowerShot or Nikon Coolpix series) are pocketable and have built-in zooms. They don’t have interchangeable lenses, but they are easy to carry. Modern compacts also include features like RAW shooting and image stabilization, making them a good travel companion.
Don’t forget smartphone cameras. Today’s phones have very capable sensors and apps for shooting. Many include multiple lenses (wide, telephoto, macro) and advanced features like HDR and manual/pro modes. If you already have a good smartphone, it can become your first “camera” for learning composition and lighting. Later you can improve mobile photography with mounts and lenses (see Smartphone section below).
Pro Tip: I’d recommend an APS-C or Micro Four Thirds sensor in your first camera. These sensors balance cost and quality. As one guide notes, “Full-frame options offer excellent sharpness but are more expensive, while APS-C and Micro Four Thirds still deliver great results for beginners”.
Essential Lenses for Beginners
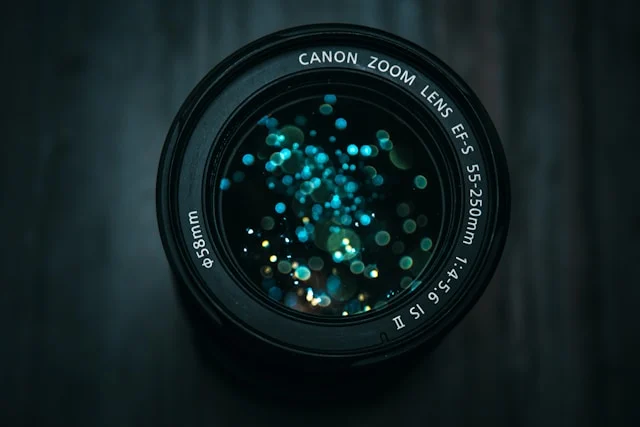
A versatile lens can open up many creative possibilities. Most starter kits come with a standard zoom (often 18-55mm on APS-C cameras). This “kit lens” covers the wide to short telephoto range, making it flexible for landscapes, street scenes, and portraits. As one source advises, “A versatile optic such as a standard zoom lens (such as the 18-55mm) is a great place to start”. You can leave it on your camera and experiment with different focal lengths and compositions. Over time, you’ll learn when the kit lens’ limitations (often variable aperture and mediocre sharpness) demand an upgrade.
Beyond the kit lens, consider a prime lens (fixed focal length). The 50mm f/1.8 (or 35mm f/1.8) is a popular second lens for beginners. Primes typically offer large maximum apertures (f/1.8 or greater) and excellent sharpness. For example, a 50mm prime (about 75-80mm equivalent) on an APS-C camera is great for portraits and low-light shots. Such primes are inexpensive (often less than $200) and help you learn depth of field and composition. As one review stated, prime lenses have “fewer optical elements, resulting in less distortion, sharper images, and better low-light performance”.
Other common lens types to know:
- Wide-Angle Zooms (e.g. 10–20mm or 16–35mm): Capture expansive scenes and dramatic perspectives (good for landscapes, architecture).
- Telephoto Zooms (e.g. 55–200mm or 70–300mm): Let you shoot subjects farther away (wildlife, sports, tight portraits). On APS-C, a 55–200mm is like a 85–300mm on full-frame. Beginners often start with an 18–55 and later add a budget 55–200 zoom for more reach.
- Macro Lenses: If you want close-ups of flowers or insects, a 60mm or 100mm macro lens will focus very close. These are specialized but rewarding.
Comparison (Kit Zoom vs Prime): The kit zoom (18-55mm) is very convenient for general shooting, but it usually has a narrow aperture (around f/3.5-5.6) and distortion at the extremes. The 50mm prime (f/1.8) lets in more light (for night shooting) and provides creamy background blur (“bokeh”). Ultimately, most photographers use one of the two: a zoom for general use and a fast prime for creative shots.
Tripods and Support Gear
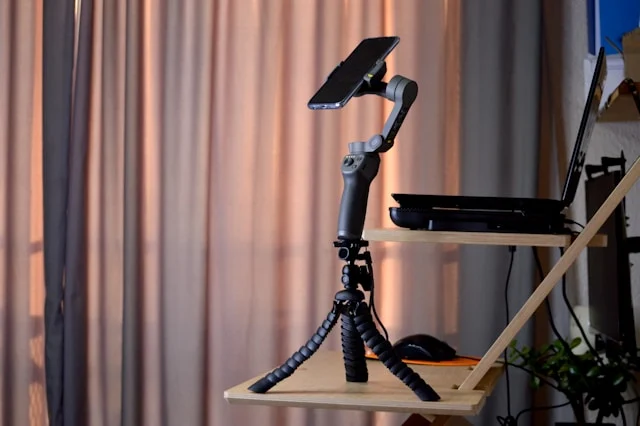
To get sharp images (especially in low light or precise composition), a tripod is indispensable. A tripod keeps your camera firmly steady so you can use slower shutter speeds or stack images for HDR. As one guide states, “a tripod is an essential tool for getting sharp and steady shots, especially in low light situations”.
When choosing a tripod, consider its load capacity (must support the weight of your camera + lens), height range, weight (for travel), and quick-release features. Even an affordable aluminium tripod (e.g. Manfrotto, AmazonBasics) can firmly support a beginner DSLR. A compact or tabletop tripod can also help when you don’t want to carry a full stand (useful for vlogging or indoor shooting).
In addition to the tripod, there are other supports to consider: a bean bag (for stable low-angle shots on uneven surfaces) and a gimbal (handheld stabilizer) if you shoot video or moving shots.
Lighting Equipment (Continuous & Flash)
Good lighting is key to great photos. For beginners, there are affordable lighting options:
On-Camera Flash (Speedlight)
A dedicated flash unit (often called a speedlight) attaches to your camera’s hot shoe. It’s much more powerful than a built-in flash and can be pointed or bounced. Using a speedlight, you can bounce light off the ceiling or walls and diffuse it to soften shadows. This gives a more natural look than a harsh direct flash.An external flash also lets you rotate the head to control direction and work off-camera (with a trigger) for creative lighting.
In short, a speedlight offers “more power, bounce and diffuse, directional control, off-camera use” and works with modifiers like softboxes. Even basic models (e.g. Yongnuo, Godox) make indoor shooting, portraits and night scenes much better.
Continuous (LED) Lighting
These are lights that stay lit (like video lights). Small LED panels or ring lights are very popular these days. They’re plug-in or battery-powered, compact and often adjustable in brightness and color. A ring light (light ring around the lens) provides even illumination on the subject (great for portraits, vlogs). Panel lights (on a stand) can simulate studio lighting outdoors or indoors.
Portable LED panels are a boon for travel—you can point a light at your subject to fill in shadows. One guide suggests carrying “a portable and rechargeable LED panel” to help illuminate your scene when needed. Even continuous lighting can be colored or diffused with gels and softboxes for different moods.
Reflectors
These are inexpensive, collapsible discs that have reflective surfaces (white, silver, gold). They bounce natural or flash light back onto your subject. Reflectors are extremely useful for filling in shadows in daylight (such as reflecting sunlight onto the face of a portrait).
They are lightweight and come in 5-in-1 kits (with diffusers). For example, a silver reflector adds contrast and highlights, gold adds warmth to skin tones and white gives a neutral soft fill. Keeping a reflector (even a simple foam board or white sheet) in your bag can dramatically improve outdoor shots without adding extra light.
Summary (Lighting Setup): Budget-wise, start with your built-in flash and a cheap reflector. Then consider off-camera flash or LED panels depending on your budget. Remember, the goal is to control light – whether by adding light (flash/LED) or shaping it (reflector/diffuser) – to improve your photos.
Essential Editing Software
After shooting comes editing. Photo editing software lets you enhance your photos, fix exposure, and apply creative effects. Even if you capture well-exposed RAW photos, they often need editing to make them shine.
Popular paid options include Adobe Photoshop and Lightroom. Photoshop is a powerhouse for retouching and compositing, while Lightroom excels at organizing and processing RAW photos. In fact, “Adobe Photoshop is one of the most popular software options” that “takes the quality of your photos up a notch”. These industry-standard tools (subscription-based) are feature-rich. Other professional options include Capture One (known for great color grading and RAW conversion).
For beginners or budget-conscious users, there are free options. GIMP (GNU Image Manipulation Program) is an open-source editor with many of the same features as Photoshop. Darktable and RawTherapee are free RAW processors similar to Lightroom. Your smartphone also has capable editors: apps like Snapseed or VSCO let you adjust curves, colors, and apply presets on the go.
In short, choose a tool that matches your comfort level. If you’re just starting, you can use free software or mobile apps to learn the basics. As you progress, learning Pro Tools (like Lightroom) will give you more control. The main thing is to edit regularly – sharpening images, adjusting exposure, cropping, and removing unwanted spots (dust, smudges) can dramatically improve your shots.
Must-Have Accessories and Gear
Beyond the camera, lens, and lighting, several other accessories will make your life easier:
Memory Cards & Storage
Always buy high-quality SD cards (Class 10/UHS-I or above) to maintain your camera’s write speed. Don’t skimp on capacity either – 64GB or 128GB cards are common. It’s wise to carry extra cards so you’re never short of space in the middle of a shoot. Consider backing up your photos, too: an external hard drive or cloud storage ensures your photos are safe. Losing a memory card can mean losing memories.
Camera Bag/Backpack
Protect your gear in a padded camera bag or backpack. A good camera bag has compartments for the body, lens, flash, and accessories. Backpacks (such as Lowepro, Peak Design) distribute weight across both shoulders and often fit a laptop. Sling or shoulder bags allow quick front access, but more gear can be carried comfortably in a backpack.
Choose a water-resistant bag if you’re going to shoot outdoors. Pockets for filters, batteries, and cards help you stay organized. As one guide notes, camera bags help you keep your equipment “safe and secure” from drops and weather.
Cleaning Kit
A basic cleaning kit (microfiber cloth, lens cleaning solution, blower brush, sensor swab) is important. Even a speck of dust on your lens or sensor can show up on images. Wipe your lens regularly and clean the sensor as needed. A lens pen or cleaning cloth is gentle on the glass; a blower (air pump) can safely remove dust without touching the optics. The cost is small, but this gear “ensures your equipment is in good condition”.
Spare Batteries
Modern cameras can eat up battery life (especially mirrorless models). Buying an extra battery (or two) can allow you to shoot all day without recharging. Official brand batteries are the safest, but many third-party options are reliable and inexpensive. Keep a charger in your bag and charge the battery overnight.
Filters
In addition to UV/protection filters, consider practical filters like polarizers (reduces reflections and darkens blue skies) and neutral-density (ND) filters (darkens the scene). Polarizers are great for controlling glare for outdoor shooting. ND filters let you use longer shutter speeds in bright light (for example to blur waterfalls or create motion in clouds). Even a good circular polarizer or ND filter can be a versatile addition to your kit. (Tip: only invest in filters that fit the thread size of your main lens.)
Miscellaneous
Other accessories include a camera strap (more comfortable or sturdier than the cheap straps that come with most cameras), a lens hood (reduces lens flare), a reflector (as discussed earlier), and a laptop or tablet for reviewing shots.
All of these accessories help protect your gear and capture photos more reliably.
Smartphone Photography Accessories
Your smartphone is a capable camera in its own right, and there are dedicated tools to boost it further:
Smartphone Tripod/Mount
A small tripod is also very useful. There are mini-tripods and mount adapters that hold your phone. Using a tripod helps to get steadier shots (especially for long exposures or video). As Adobe points out, a smartphone tripod will improve “nighttime shots, self-portraits, and more” by eliminating arm shake. Many tripods also fold into small tabletop stands for low-angle shots.
Remote Shutter
With a Bluetooth remote, you can turn on the camera without touching it. This prevents the camera from shaking and you can easily take group selfies or long exposures. These are inexpensive and very useful when using a tripod.
Gimbal/Stabiliser
For video or moving shots, a small handheld gimbal holds your phone level as you walk, preventing wobble. Even basic gimbals (often for smartphones) vastly improve the smoothness of video. They also work for panning shots or steadier handheld photos.
Clip-On Lenses
You can buy clip-on lens kits (wide-angle, macro, fisheye) for smartphones. These screw or clip onto your phone’s camera. A wide-angle or macro clip lens can add versatility to phone photography without much investment.
Portable Light
A small LED light that attaches to your phone or tripod can brighten night shots or fill in shadows. Even a mini ring light (which often clips around the phone) helps for portraits and videos. One recommendation is carrying “a portable and rechargeable lighting setup (like an LED panel) to travel with” for on-demand light.
Power Bank
Phones drain power quickly when shooting photos/videos. A portable battery pack (“power bank”) ensures you don’t lose power mid-shoot, especially outdoors or on long outings.
Apps and Modes
Use your phone’s camera app in Pro/Manual mode if available (controlling focus and exposure yourself). Many smartphones also let you shoot in RAW (uncompressed) for better editing later. For editing, free mobile apps like Adobe Lightroom Mobile, Snapseed, or VSCO can do a lot of color and exposure tweaks on the spot.
With these accessories, your phone can handle many photography tasks. Indeed, having a tripod and remote is one of the easiest ways to turn your phone into a more serious camera.
(Bonus) Film Photography for Beginners
If you’re curious about classic photography, film cameras can be fun tools for beginners. Film SLRs like the old Pentax K1000 or Nikon FM2 are fully manual cameras that teach the basics. There are also inexpensive point-and-shoot film cameras and instant cameras (Instax). Shooting film means buying rolls of film and developing them yourself or using a lab. Scanning negatives or prints will make your photos digital.
Film teaches you to think about every shot (because you have a limited number of frames), and many beginners find this beneficial. However, film and development costs add up, so budget for that. For a combined approach, you can scan the film and process it in digital software as RAW files, combining analog shooting with modern editing.
Putting It All Together
Building your photography toolkit is a step-by-step journey. Start with a good camera body and a versatile lens. Then add a tripod and basic lighting (even a reflector). Learn to use editing software to improve your images. Gradually expand as you go: invest in a faster prime lens, a speedlight, or more advanced software.
Remember, gear is only half the battle – practice and creativity are the other half. Use these tools to explore composition, light, and storytelling. As you go, adapt your toolkit to your interests (landscape, portrait, macro, etc.). With the right entry-level gear, software, and a curious mindset, you’ll be well on your way to capturing great photos. Happy shooting!

