Introduction
Photo manipulation is the art of combining two ordinary photos to create an extraordinary visual. The artist creates designs based on their imagination, delivering powerful and memorable messages to the audience. It involves enhancing, retouching, or even completely transforming photos to achieve artistic or conceptual goals.
How do you choose the right size for your photo manipulation project?
When starting a photo manipulation project, it’s important to choose the right dimensions for your canvas, especially if you’re designing for a specific platform like Instagram. Here’s a quick guide to Instagram dimensions:
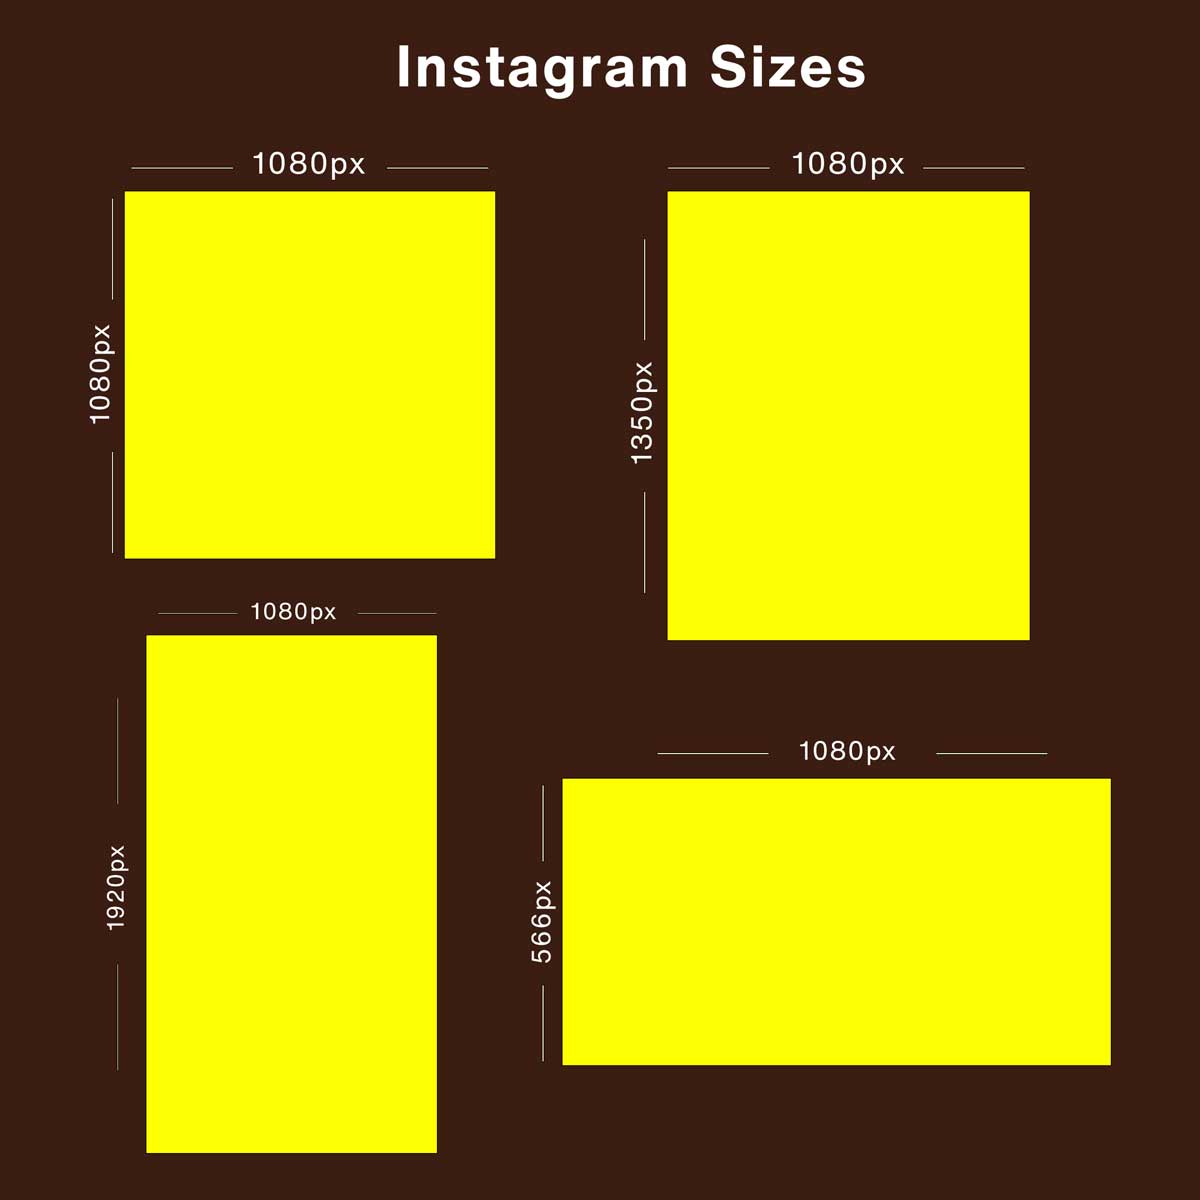
Instagram dimensions (in pixels)
Square size: 1080×1080 (1:1)
Portrait size: 1080×1350 (4:5)
Landscape size: 1080 x 566 pixels (1.91:1 ratio)
Story Size: 1080 x 1920 pixels (9:16 ratio)
*Sizes vary on different platforms.
Creating a sci-fi photo manipulation poster
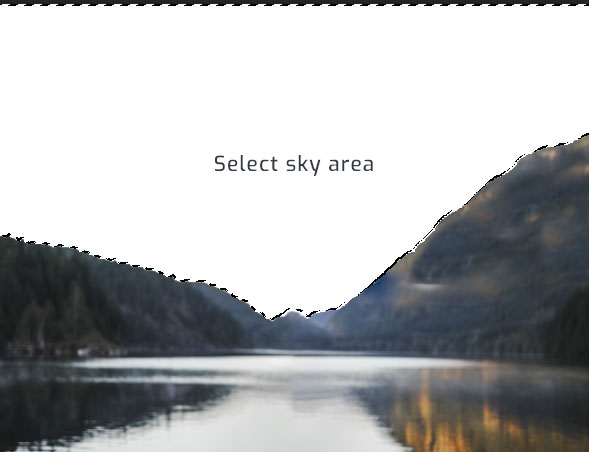
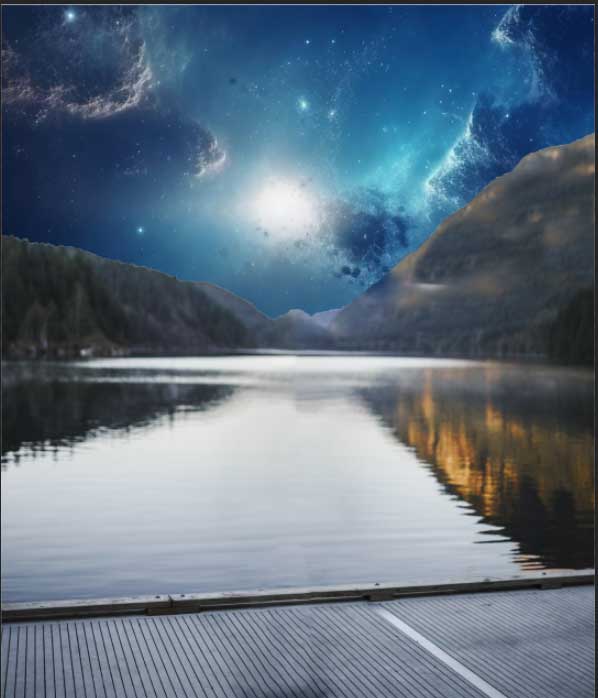
Step 2. Replace the old sky with a new sky image.
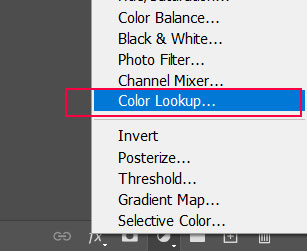
Step 4. Now, blend the color tone of the sky and the background image. Click ‘Create new adjustment layer‘ at the bottom of the layer panel and select ‘color lookup’.
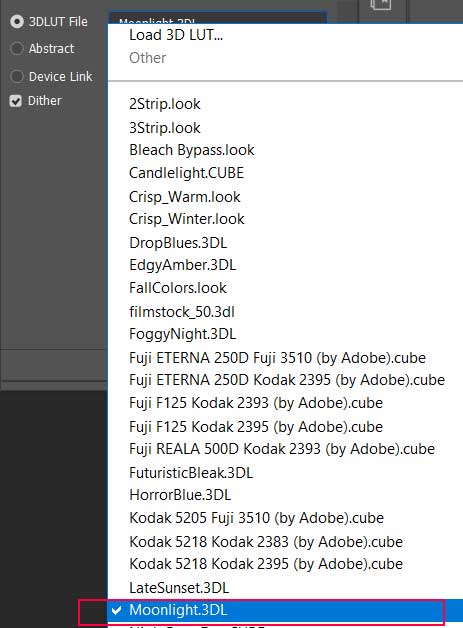
Step 5. In ‘color lookup’, select ‘Moonlight 3DL’.

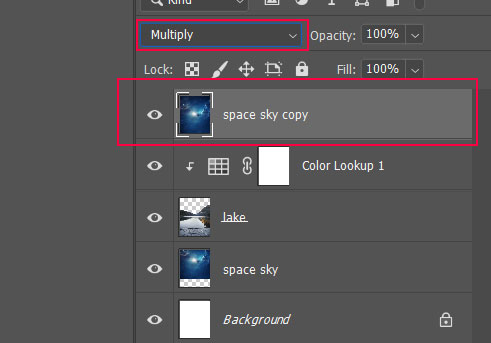
Step 6. Now create sky reflections on water to make it more realistic. Create a copy of the space sky layer, place it above the lake layer and then change its blending mode to multiply. To make reflections only visible on the water, use the masking tool to erase the rest of the image.
Understanding Layer Masking in Photoshop
Layer masking is a fundamental technique in photo manipulation. It allows you to hide or reveal parts of a layer without permanently altering the original image. This non-destructive method is essential for precise edits.
How to Use the Layer Mask Tool:
- Click the ‘Add Layer Mask’ button at the bottom of the layer panel (it looks like a rectangle with a circle inside).
- Paint over the layer mask with black to hide parts of the image, and use white to reveal them.

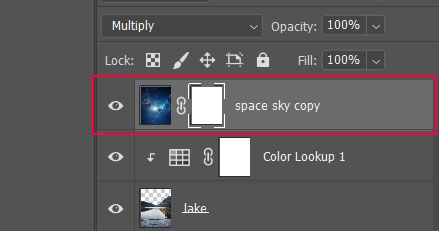
Step 7: Use the layer mask by clicking the ‘add layer mask’ button at the bottom of the layer panel (it looks like a rectangle with a circle inside). Start painting black on a copy of the space layer to hide the unusual part.
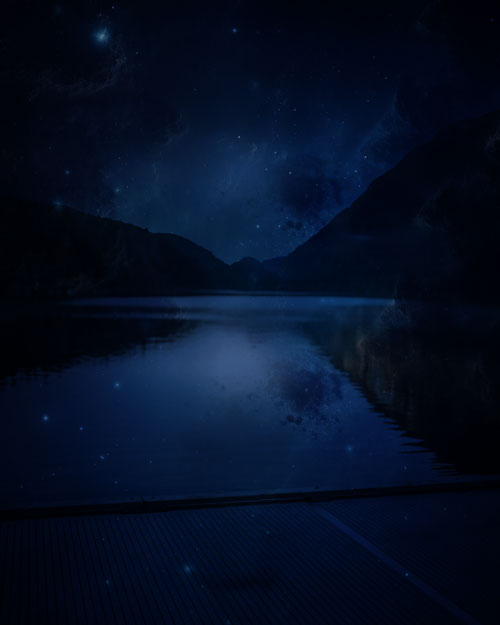
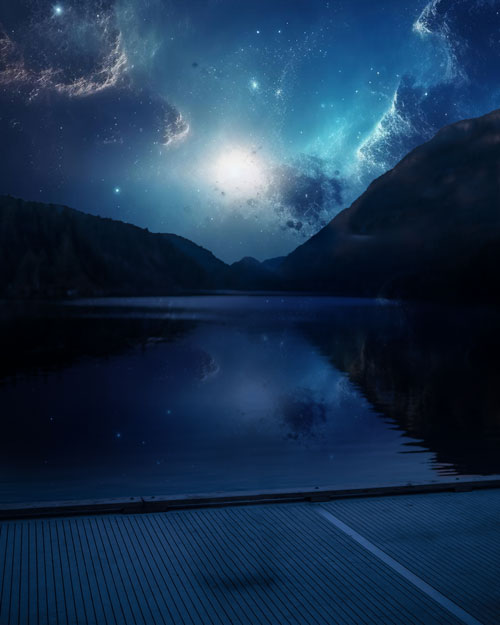
Step 8. Add the image of a boy (the main subject) and apply the ‘Moonlight 3DL’ effect. It blends the boy’s image with the background. Next, apply the ‘see-through effect’ to our subject.
Create the ‘See-Through Effect’ in Photoshop
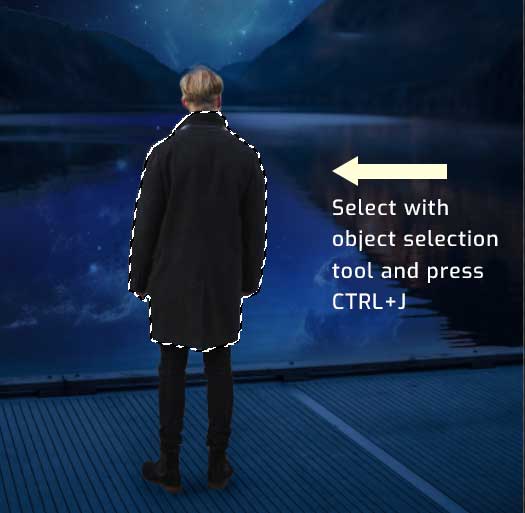
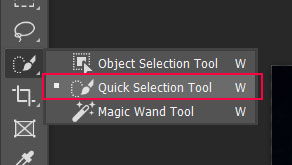
Step 9 Use the ‘quick selection tool‘ to select the object’s upper body, and then press ‘Ctrl+J‘ to extract the selection into a new layer.
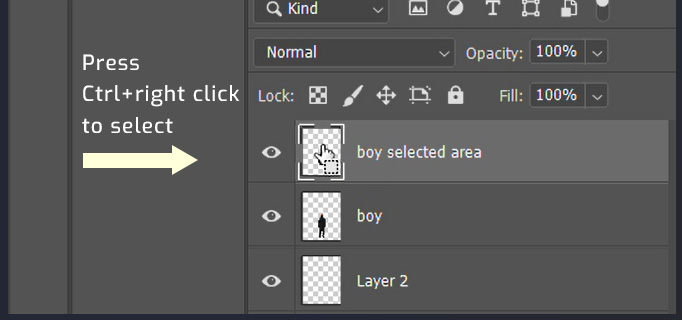
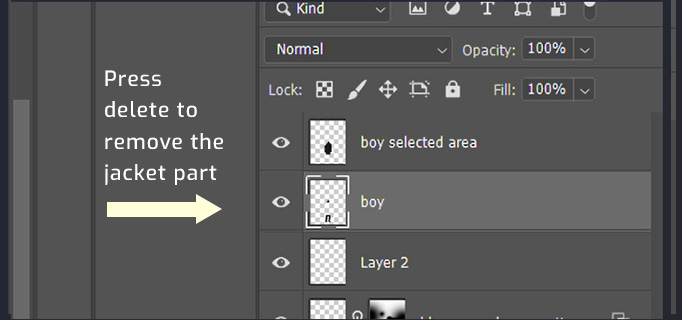
Step 10: Delete the selected area from the ‘boy‘ layer.
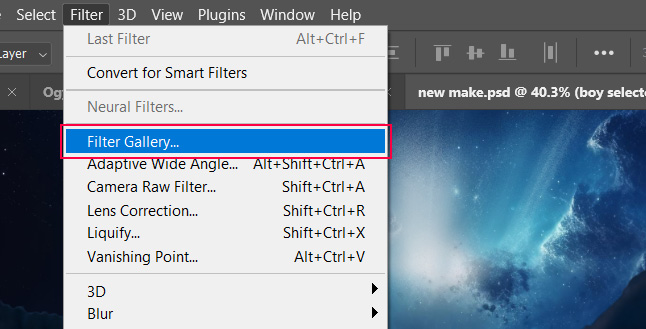
Step 11. Select ‘Filter Gallery‘ from the ‘Filter‘ menu at the top of Photoshop. In the ‘Filter gallery’, look for the ‘glowing edges‘ option under ‘Stylize‘.

Step 12. Apply the effect on ‘boy selected area‘ layer, set ‘Edge width’ to 2, ‘Edge brightness’ to 5, and ‘Smoothness’ to 1, and then press OK.
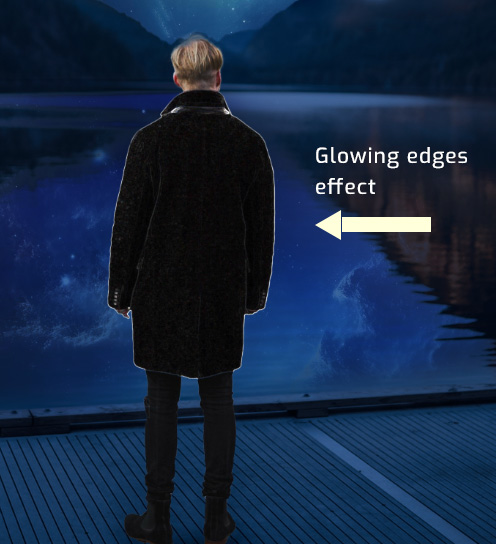
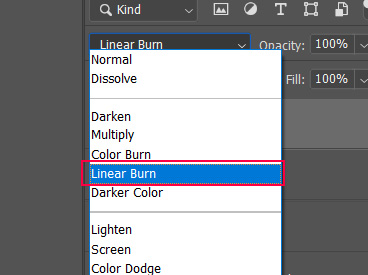
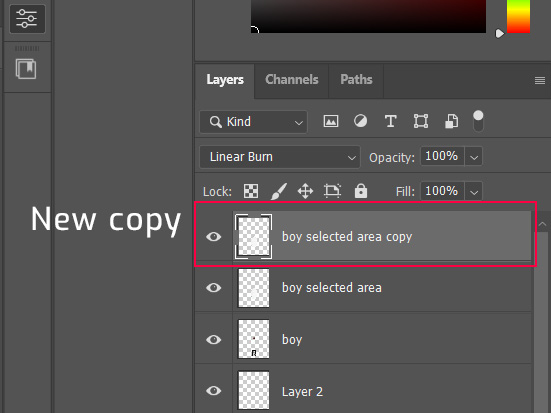
Step 13. Select the layer and press ‘Ctrl+I’ to invert it, then change its blending mode to ‘Linear Burn’.
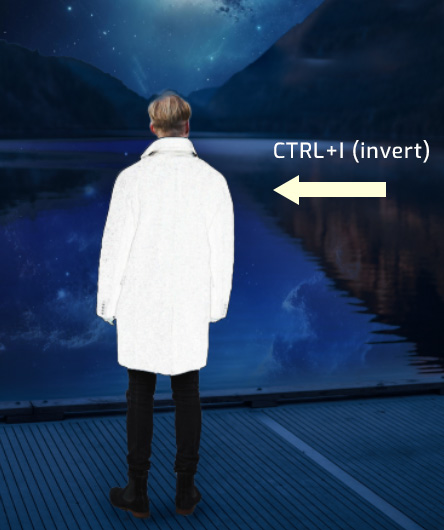
Step 14. Select the layer and press ‘Ctrl+J‘ to make a new copy and invert it by pressing Ctrl+i
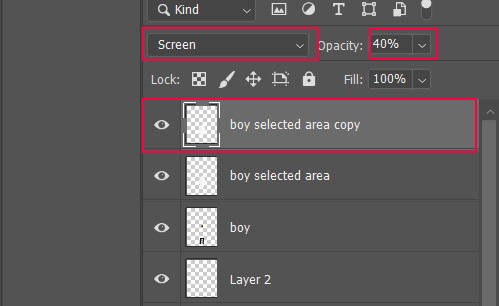
Step 15. Change the blending mode to ‘Screen’ and set its opacity to 40%’.
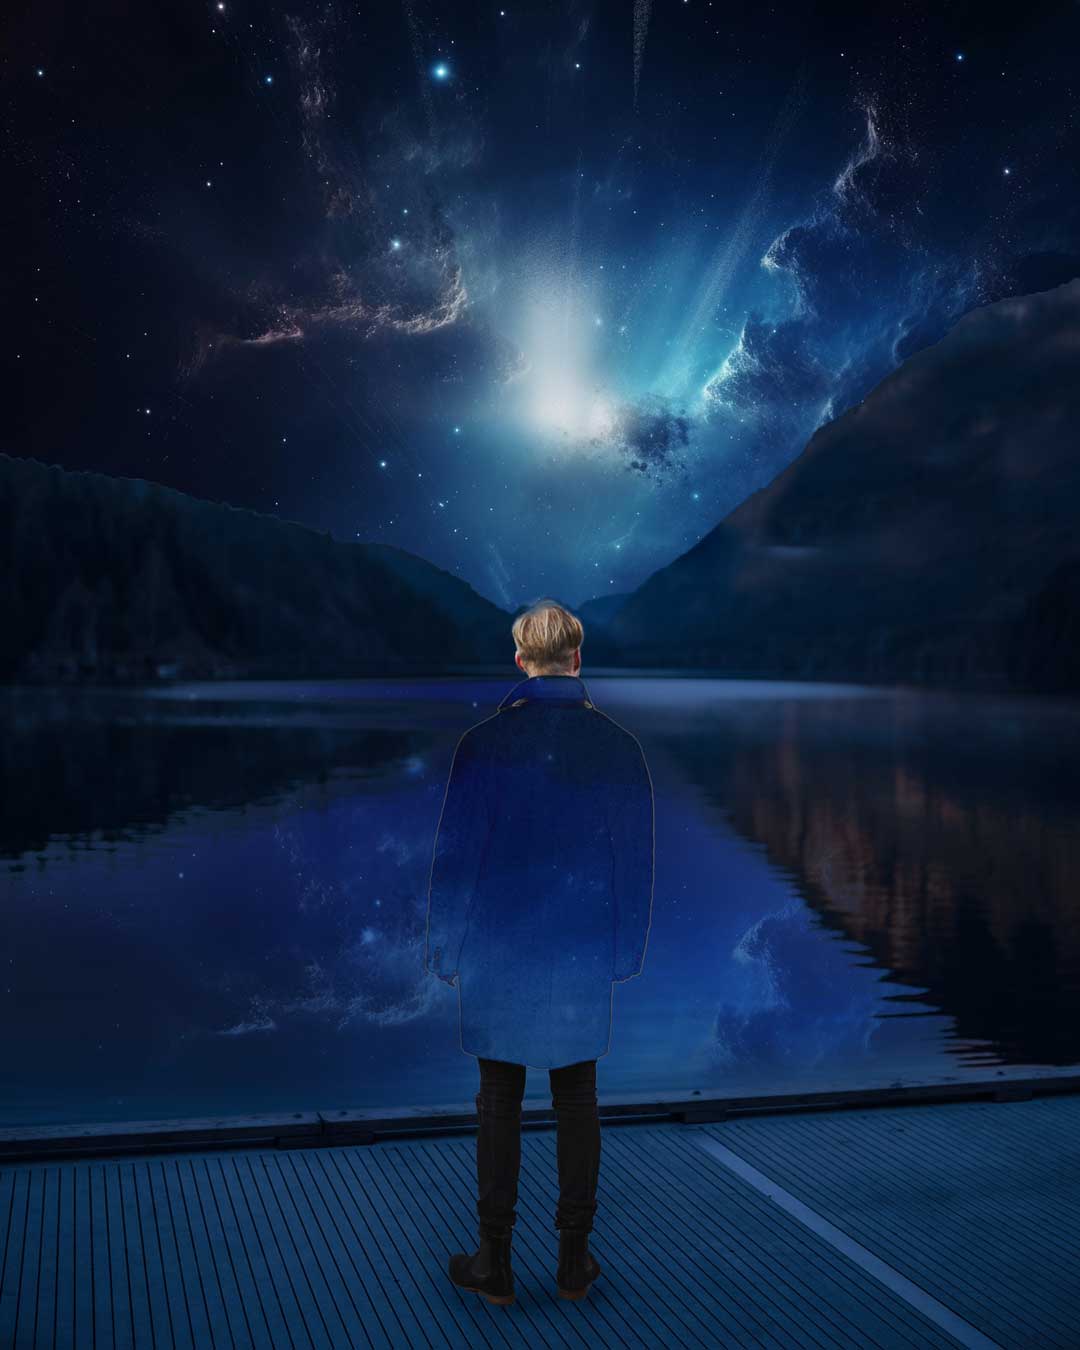
Note: Blending modes are powerful for creating unique and interesting effects in your images. Adjust the layer’s opacity to control the strength of the blending effect. Use multiple layers with different blending modes for amazing effects. Always keep experimenting with blending modes for unique results.
Final touch-ups to the photo manipulation poster
Now, you have successfully designed decent photo manipulation art. The next step is to transform your Photoshop manipulation into a poster design or photo manipulation poster. To create a poster design, you must follow graphic design principles or basic design rules.
The theme of photo manipulation art is SCI-FI-based. You have to add sci-fi elements and sci-fi fonts.
Sci-fi fonts
Sci-fi fonts are typefaces designed to evoke a sense of futuristic, technology, and space exploration. They are commonly used in futuristic designs or high-tech aesthetics, science fiction movie posters, video game posters, or any creative work that needs a touch of the future.
Step 16: Create a new ‘black and white’ adjustment layer. Set its ‘opacity’ to 36%.
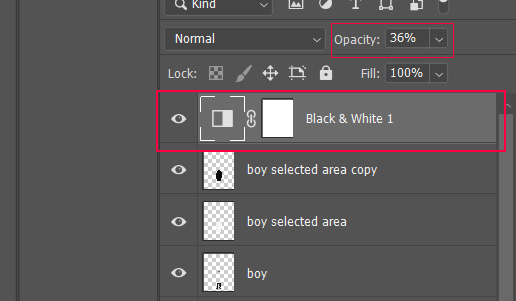
Step 17: Write the main heading in your desired sci-fi font. Add some sci-fi elements to your art.
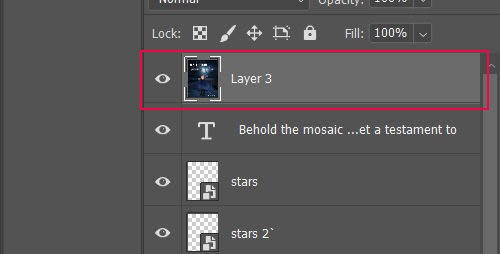
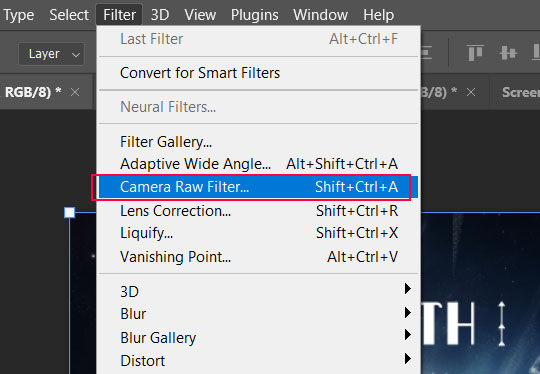
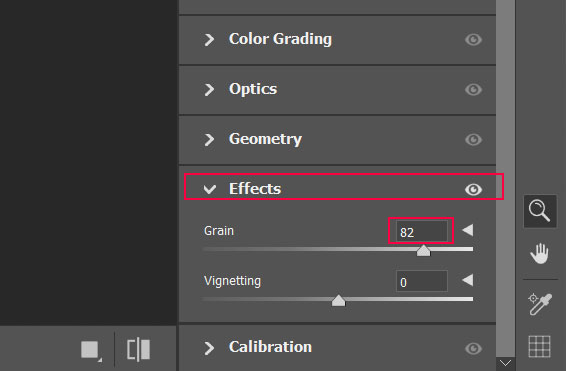
Step 18: Press ‘Ctrl+alt+shift+e’ to make a new flattened layer. Go to the camera raw filter on top of Photoshop and add a grain effect to make it more effective.

Some Popular Sci-Fi Fonts:
- Orbitron: It is a geometric sans-serif typeface with a futuristic look. It can be used in headers, titles, and logos. Available in ‘Google Fonts‘.
- Neuropol. It is rounded and has a sleek, modern design. It can be suitable for posters, logos, and video game titles. Download it from Dafonts.
- Bank Gothic: A square-shaped font representing a techy and futuristic feel. They are used in headlines, titles, and tech-themed designs. It is available on various font websites (which may require purchases).4.
- Exo: It is a geometric sans-serif font with a sci-fi vibe. It is perfect for websites, apps, and user interfaces. Available in ‘Google Fonts‘
- Astro: It is also a futuristic font with sharp and angular lines. Excellent for logos, posters, and branding. Download it from ‘Dafonts’.
- Agency FB: A clean and sleek font often used in tech and sci-fi designs. It is great for interfaces, branding, and titles. Available in ‘Dafont’
Tips for Using Sci-Fi Fonts
Pairing sci-fi fonts works well with clean and minimal sans-serif fonts for body text. This creates a nice contrast.
Adjust the letter spacing to achieve the desired look. Sci-fi fonts look great with tight or expanded letter spacing.
Always use bold and futuristic colors like neon blues, greens, and metallic shades to enhance the sci-fi effect.
Conclusion
Mastering photo manipulation, especially for creating sci-fi posters, requires a deep understanding of Photoshop tools, design principles, and typography. By following the steps in this guide and experimenting with different effects and fonts, you can create visually stunning and impressive designs that stand out.
Whether you’re designing for social media, movie posters, or personal projects, the skills you develop through photo manipulation will take your creative work to new heights.


